Queen’s Garden: The Easiest Trek into the Bryce Canyon Amphitheater
Disclaimer: We are not paid to promote any restaurant, hotel, activity, product, or attraction. All opinions are subjective and based on our personal experience. Your experience may be different.
Mike and I are on a mission to visit all Utah national parks while we are living in relatively close proximity in Phoenix. Most of these parks are about a 7-8 hour drive, so a doable weekend roadtrip destination. First on our list was Bryce (we already visited Zion several years ago and loved it). After a long, tiresome 7 hour drive, we were ready to explore but also didn’t want to go overboard. It’s hard to set off on a 8 mile trail after such a lengthy drive. While the easier Rim & Mossy Cave trail are both great, we wanted to hike at least one trail that ventured into the amphitheater for a closer look at the unique hoodoos. We decided Queen’s Garden was the best fit for this trip.
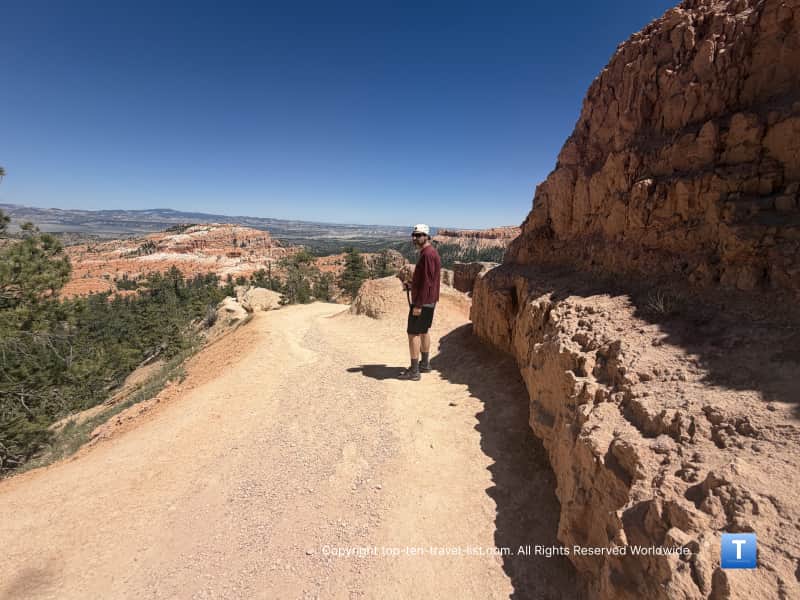
According to the NPS, this is the easiest trek into the amphitheater. Honestly, I can’t imagine what the other hikes are like if this is considered easy! Due to the steep nature, scary drop offs, and high altitude (8000+ feet), I would rank this trail as moderate for regular hikers/gym goers and difficult for anyone else. It may be easy in comparison to other trails within this park, but it is not “easy.” We are regular hikers, joggers, and weight lifters and we found this hike to be moderately difficult.
That being said, the views were so stunning. I recommend adding it to your bucket list if you are seeking something slightly challenging but stunning at the same time. We got in a great workout and enjoyed some of the most fabulous views out of any of the Western national park we have visited thus far.
How to get here
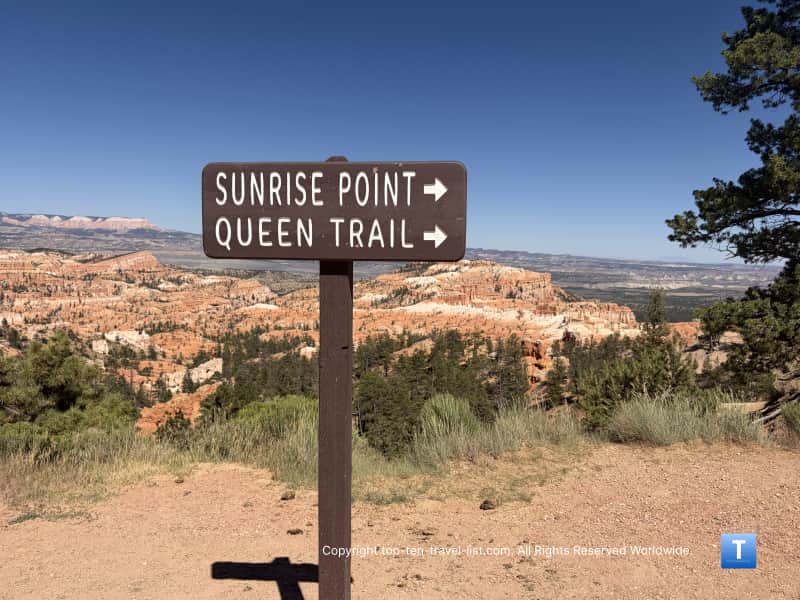
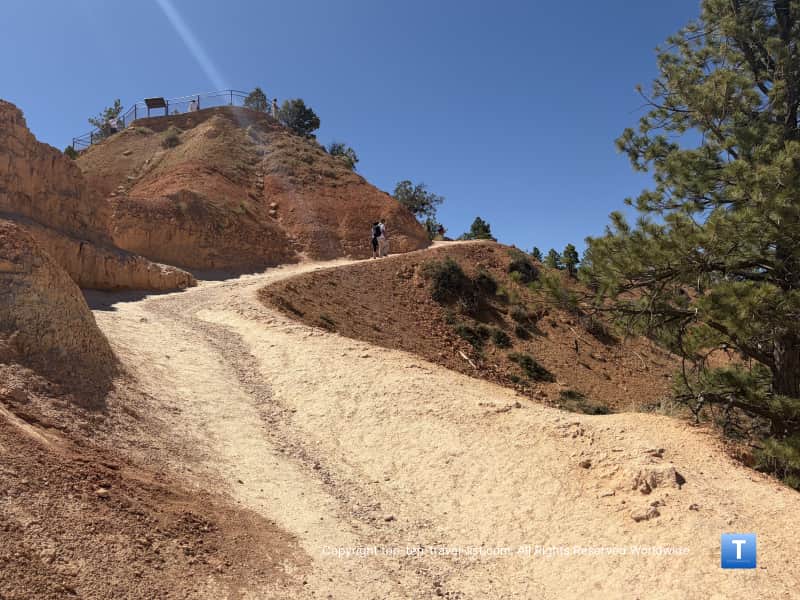
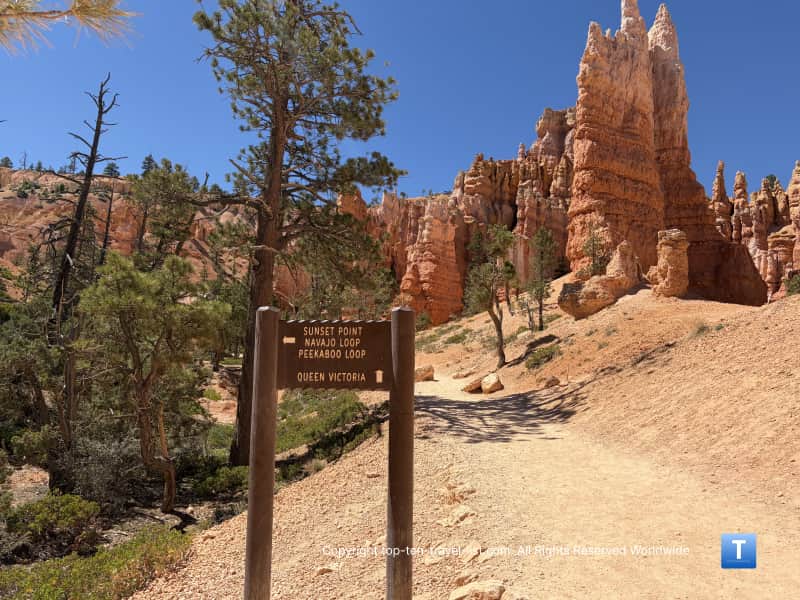
There are 4 major viewpoints within the park (Inspiration, Sunrise, Sunset, and Bryce Point). This trail begins at the Sunrise Point overlook. I love how this park is organized – they offer a convenient seasonal shuttle where you can get off at various points. We took the complimentary shuttle from where we were staying (Ruby’s Inn) to Sunrise. I highly recommend booking a property with a shuttle so you don’t have to drive (parking here is a hassle and spaces are limited).
Note that even though temps are cooler at high altitude (this trail is located at ~8000 feet), it’s easy to overheat here with the strong afternoon sunshine. Even coming from Phoenix, we were hot and 70 degrees felt more like 90+ in the direct sunlight. Hiking earlier or just prior to sunset is always a better idea. Unfortunately, the only time we could fit this hike in was mid afternoon as our itinerary was pretty packed. That being said, I don’t recommend hiking mid day during the summer!
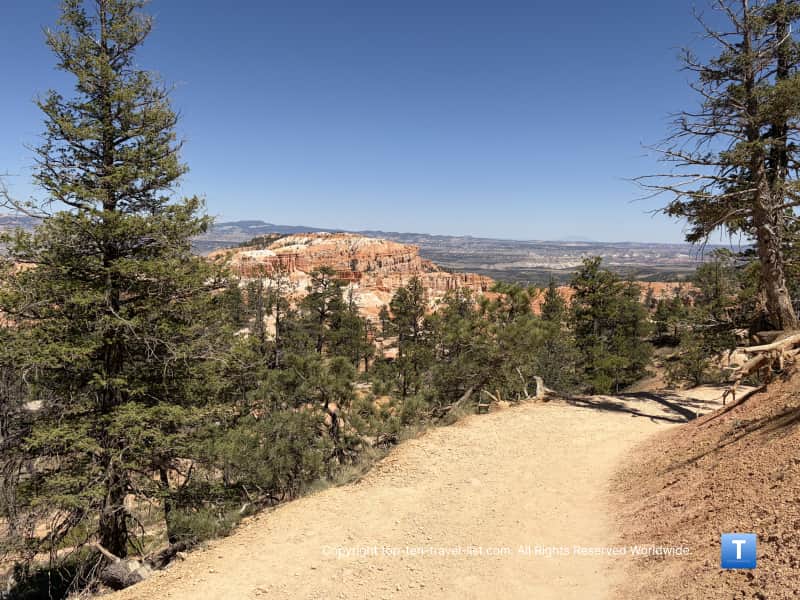
The trail: It’s short, but feels much longer
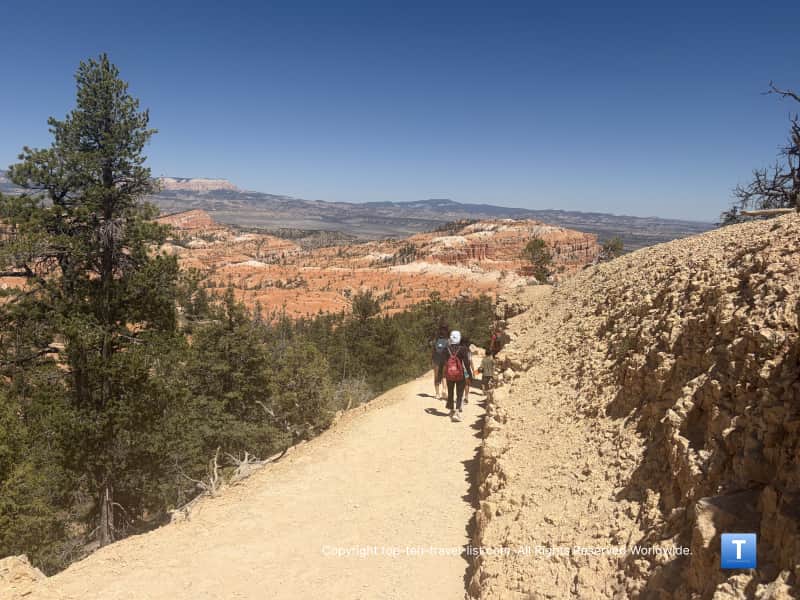
According to the park’s website, it’s 1.8 miles out-and-back to the Queen Victoria hoodoo. Honestly, it felt a bit longer to me especially on the way down as you have to be so careful of your footing. We learned from our shuttle guide hikers wearing inappropriate footwear is the top cause of injuries and leads to many rescue missions.
It can be difficult maneuvering downhill with the loose gravel so take your time, wear hiking shoes with proper traction, and carry a hiking stick for extra balance. Also take it slow and plan more time than usual. Bring plenty of water to prevent dehydration and altitude sickness. Dehydration and overexertion are amongst the top search and rescue missions.
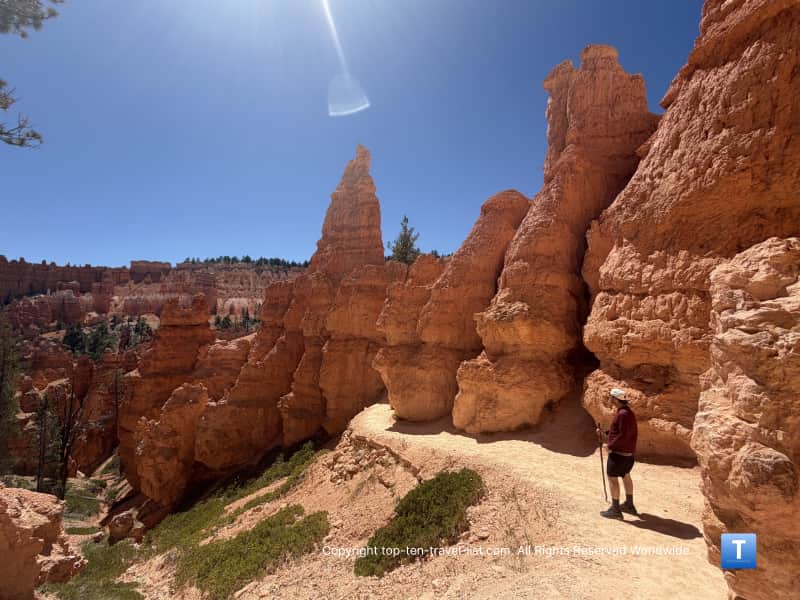
It’s steep and a bit scary!
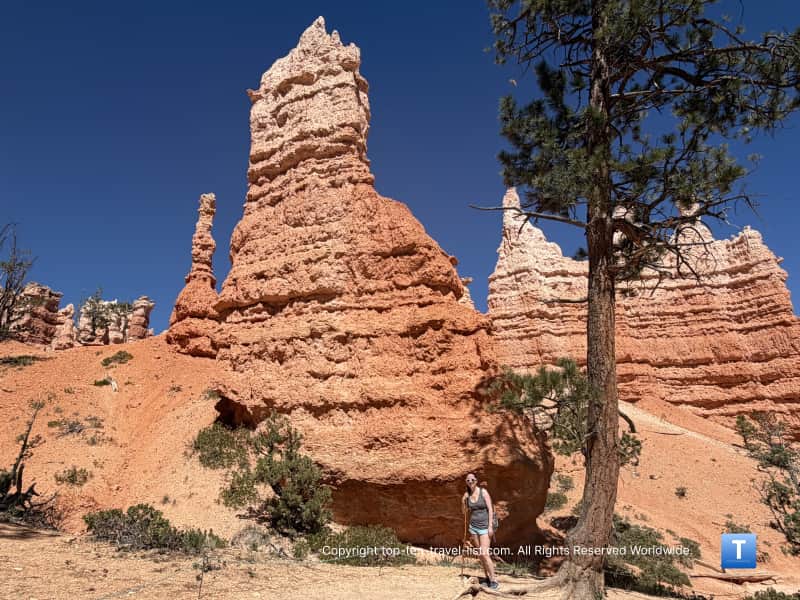
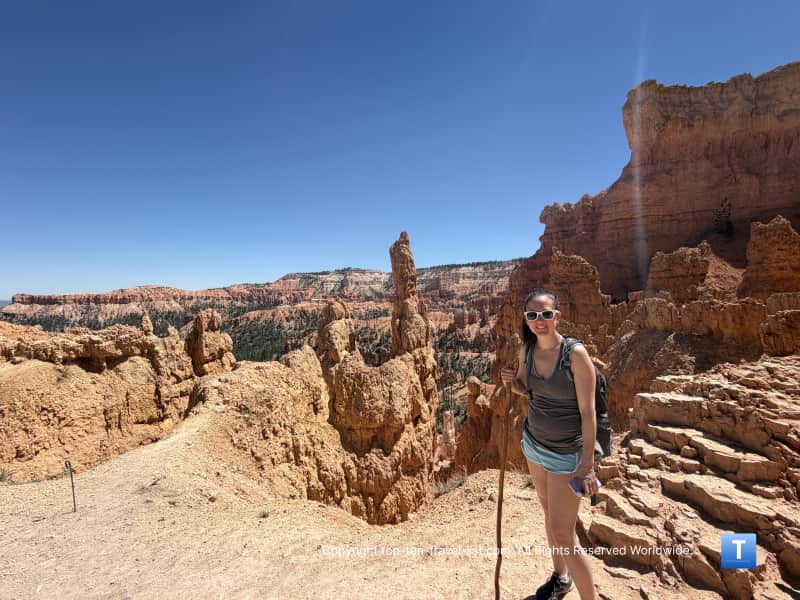
Note that the beginning of this trail is pretty scary with steep drops offs of several hundred feet. We saw several hikers turn back around and I don’t blame them as it’s pretty scary looking down 300+ feet beneath you. Portions of the trail feel pretty narrow. I am not scared of heights, but I was a bit queasy starting this one off. The park notes that the typical trail width is 81 inches with the narrowest portions being a mere 33 inches.
There are some nice viewpoints from the top, although you need to be careful taking pictures as the path is so narrow. Never get too close to the edge!
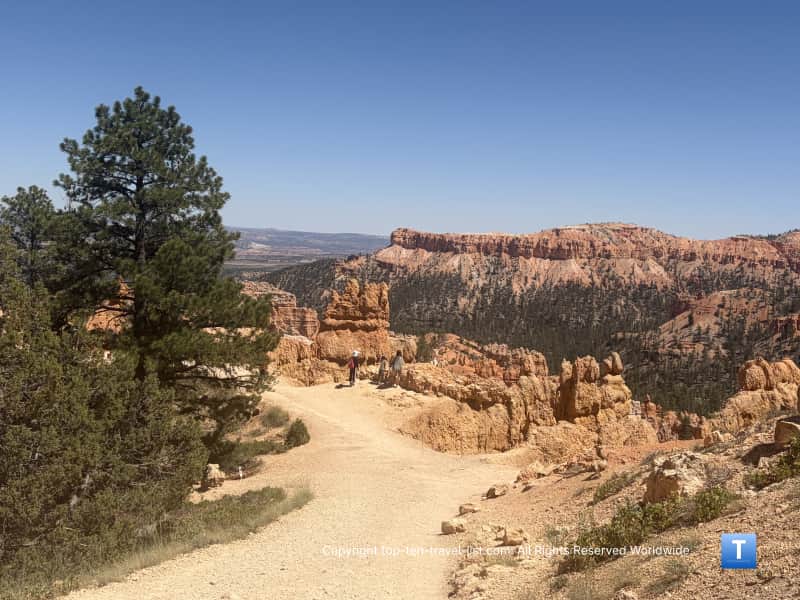
Thankfully, the scary section is more towards the beginning of the trail. After the first short section, the big drop offs disappear. However, the real challenge is the climb back up. The trail begins on a downhill descent but remember what goes down must come up! It’s a lot more challenging going uphill and you need to keep in min that you have less oxygen at high altitude.
If you are scared of heights, I wouldn’t recommend this one as your first choice – I would say to stick with the Rim or Mossy Cave trail instead.
8000 feet = lower oxygen levels
The air is much thinner at 8000 feet. According to the Center for Wilderness Safety, the effective oxygen percentage is 15.4%. You may breathe faster, pee more, sleep less, and your heart may beat faster. You can look at these tips for preventing altitude sickness. Typically, most experts recommend eating more carbs, drinking more water, taking it slower than usual, and getting used to the new conditions for a day or 2 before hiking (this can be difficult if you are limited on time).
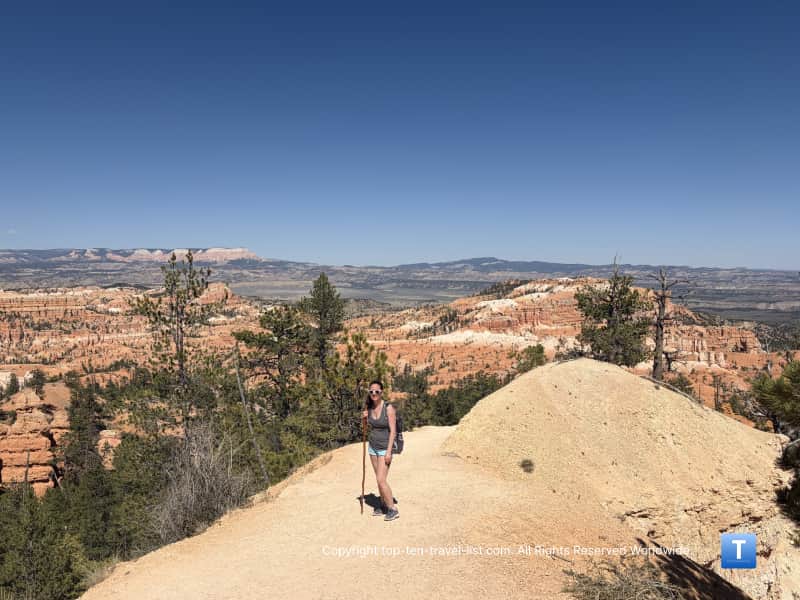
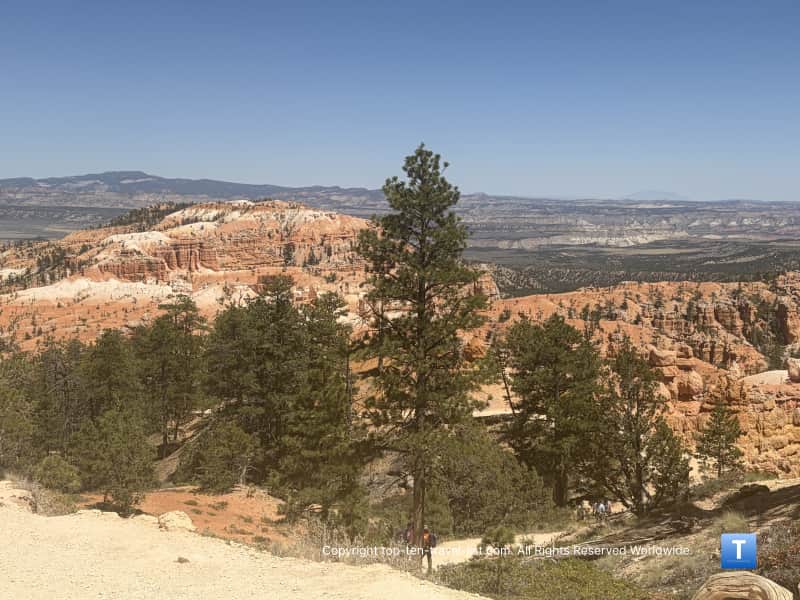
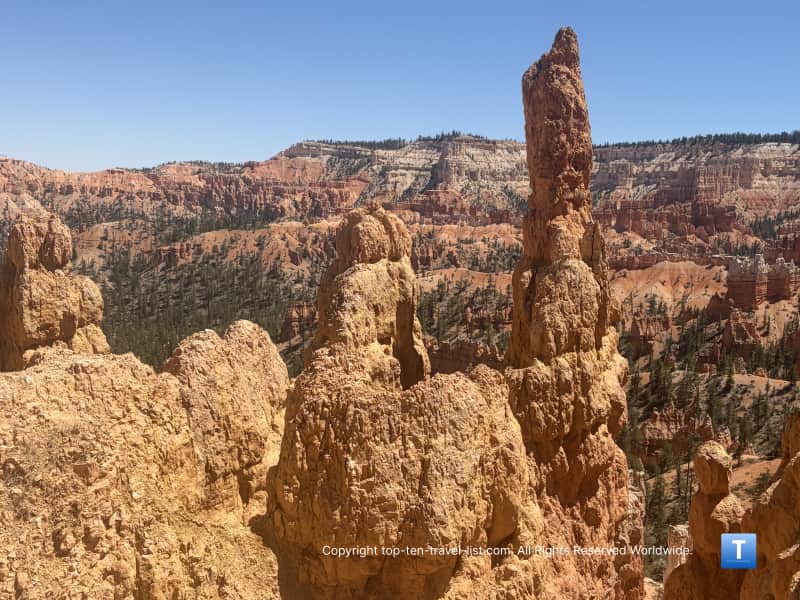
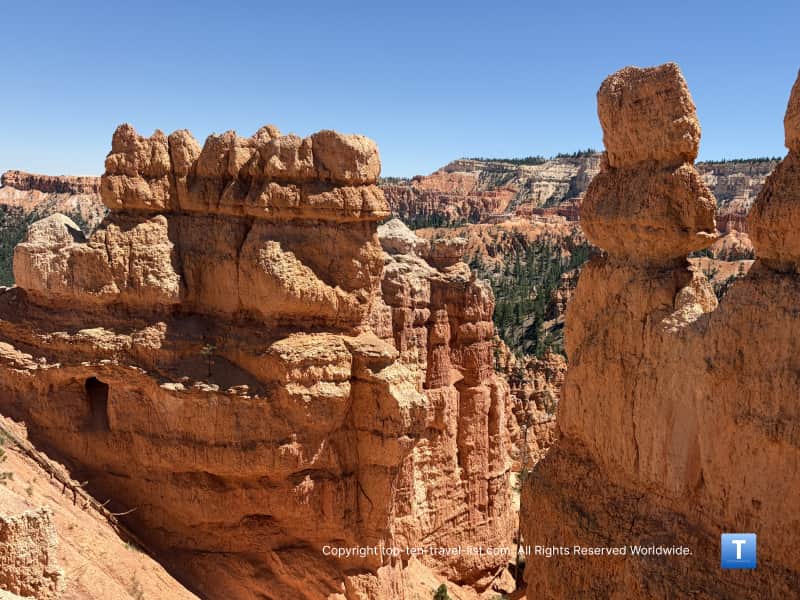
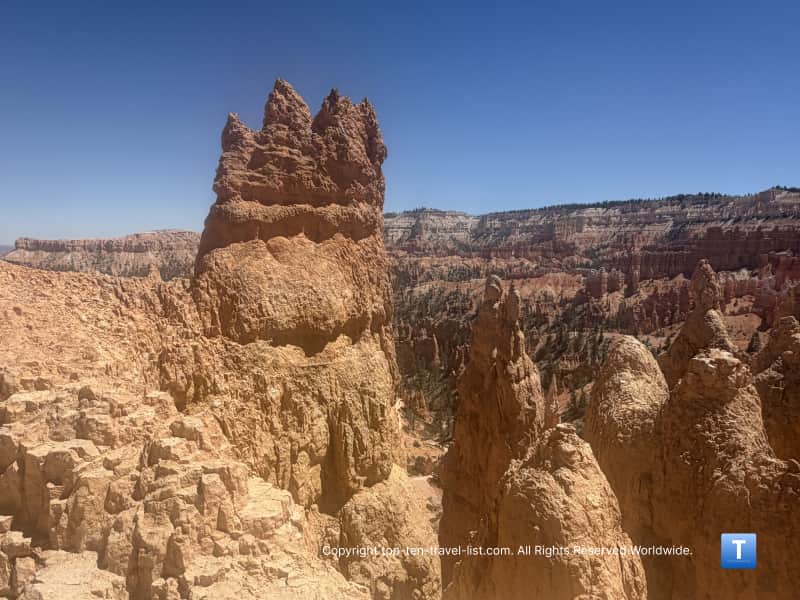
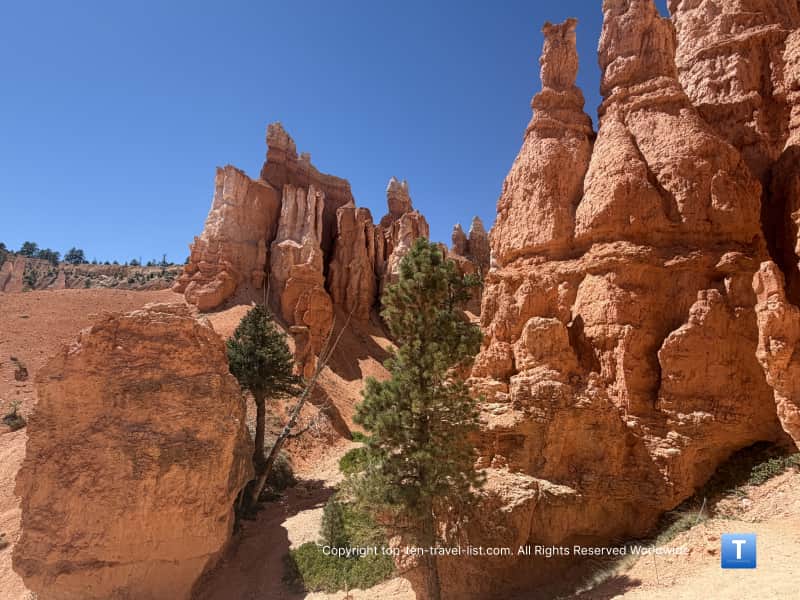
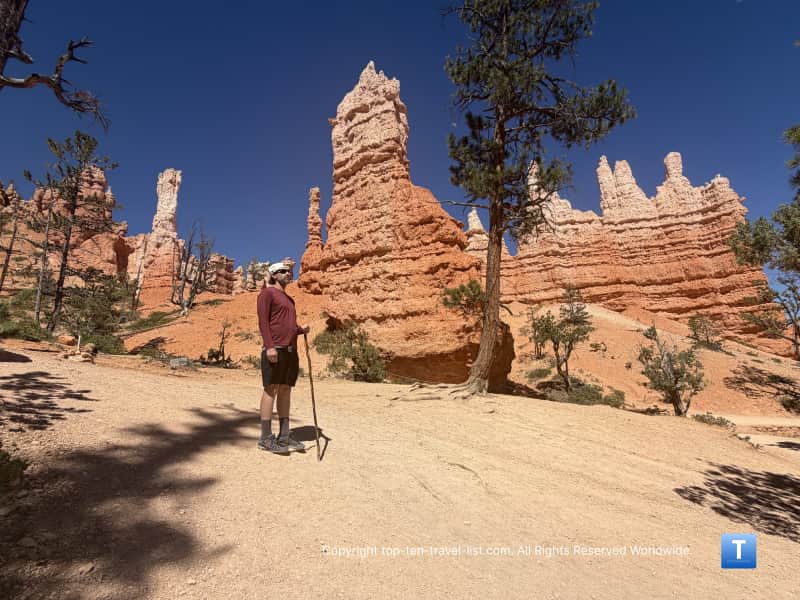
Hoodoos everywhere
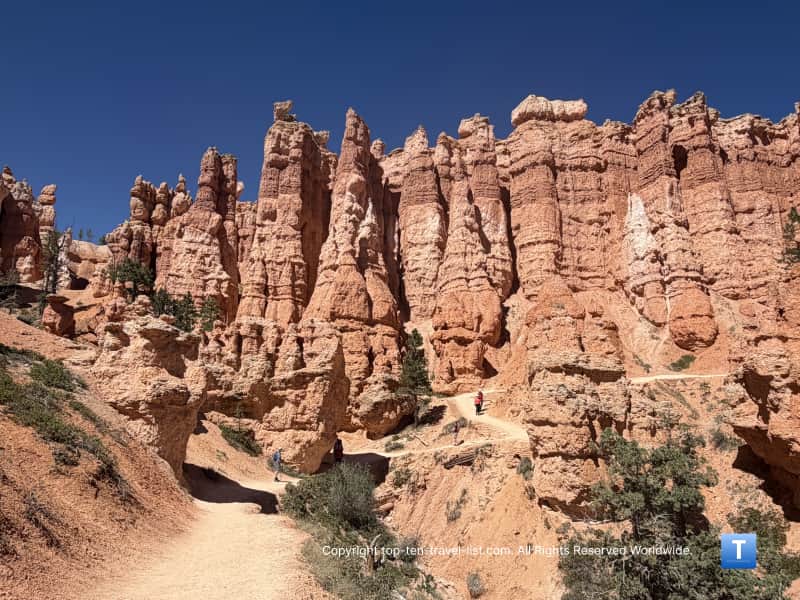
Hoodoos, which are tall thin rock spires, grow in arid areas of the Southwest. While this park most famously is home to the most in the world, they can be found at other parks too. I really loved hiking at Chiricahua National Monument which is one of many amazing daytrips near Tucson. It’s called the Wonderland of Rocks for a reason (it’s such a cool place and much less crowded than Bryce!).
You will see so many colorful hoodoos on this hike, other hikes in the park, the scenic overlooks, and even along the scenic drive (which I highly recommend making the time for). The cool thing about hiking the amphitheater trails is that you get to enjoy a more up close viewpoint than you would via the scenic drive or overlooks.
I love hoodoos – they are so exotic and colorful. I took a bunch of pictures to give you an idea. According to the NPS, the brilliant reddish/orange hues is the result of iron oxidation. You can read more about the process if interested.
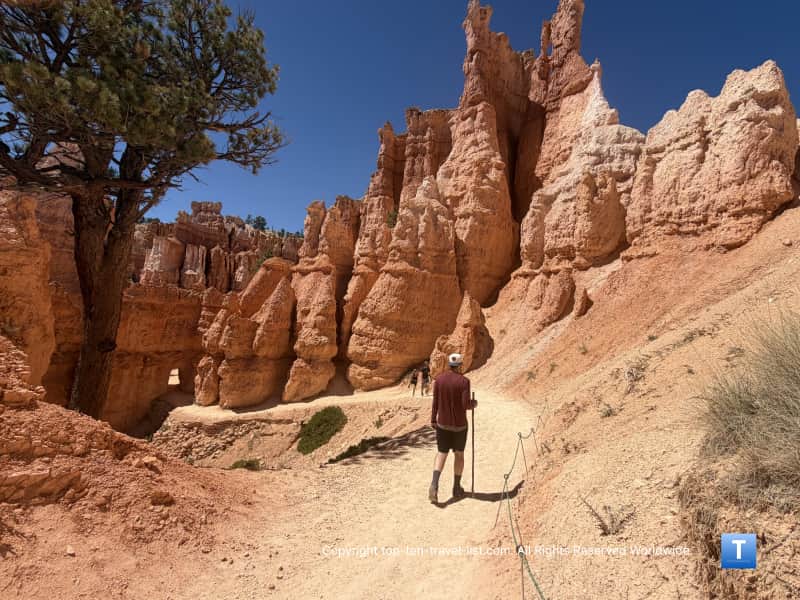
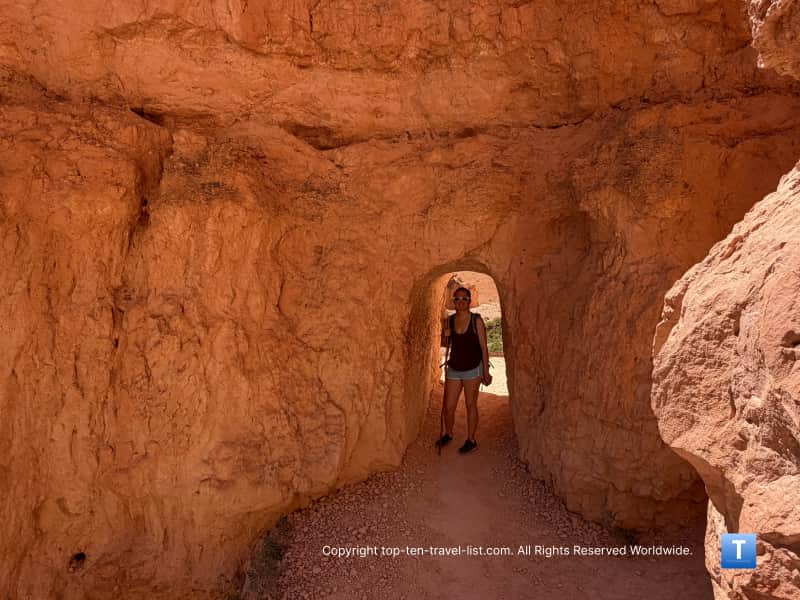
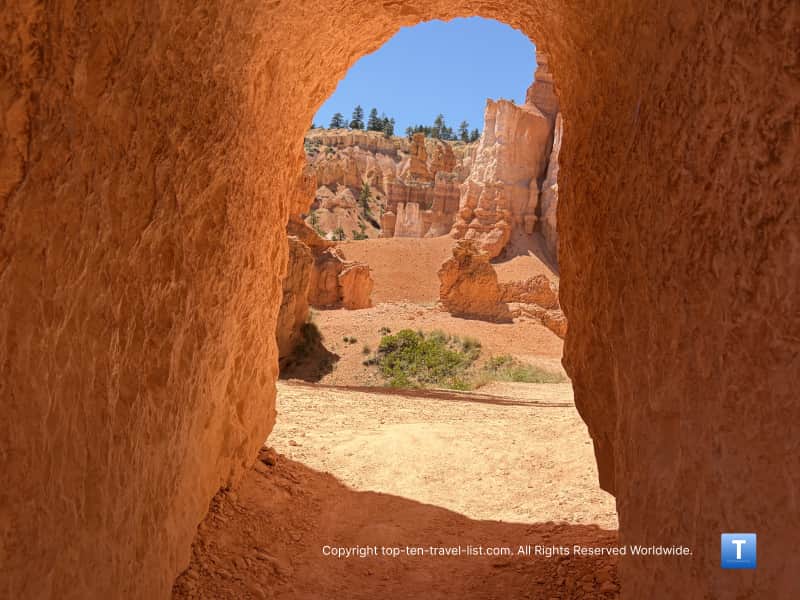
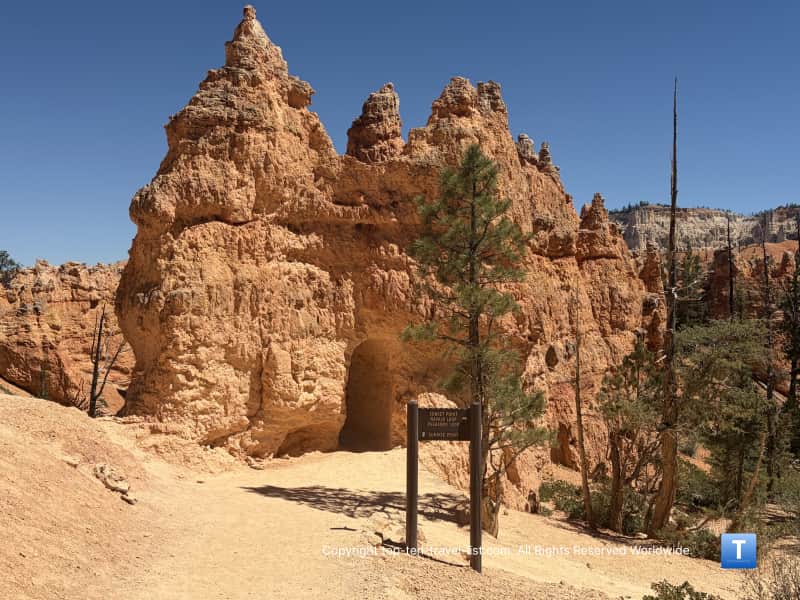
Man made tunnels through the sandstone
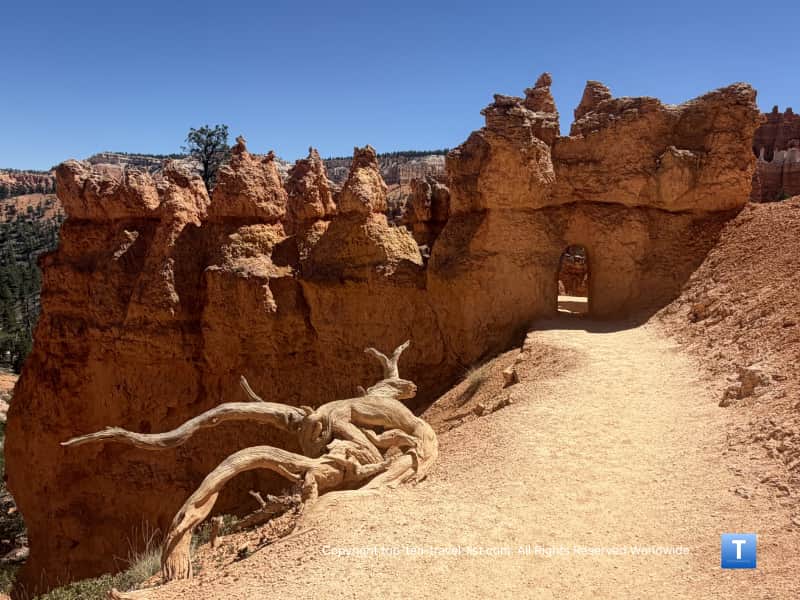
What I loved most about this trail were the man made tunnel arches carved through the hoodoos. This is not something you see everyday so pretty cool. Fortunately, we hiked this trail pretty late in the day after everyone left and got plenty of pictures!
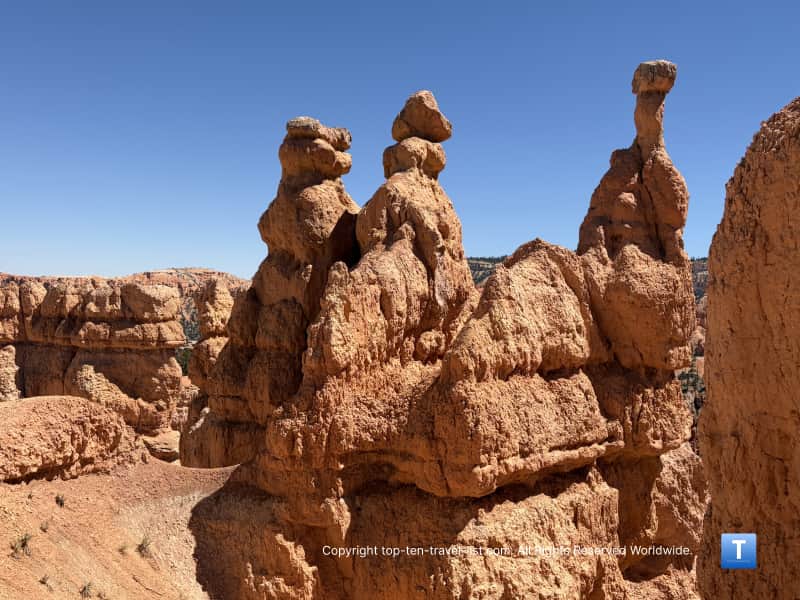
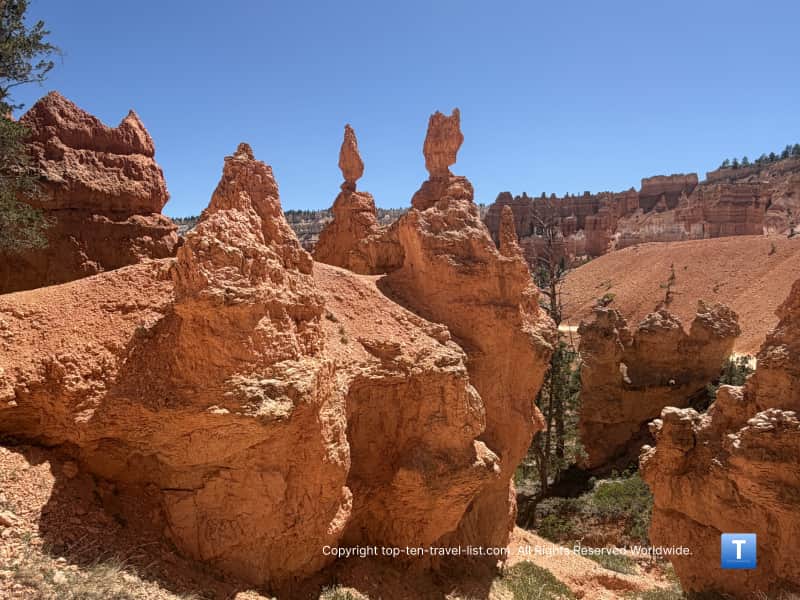
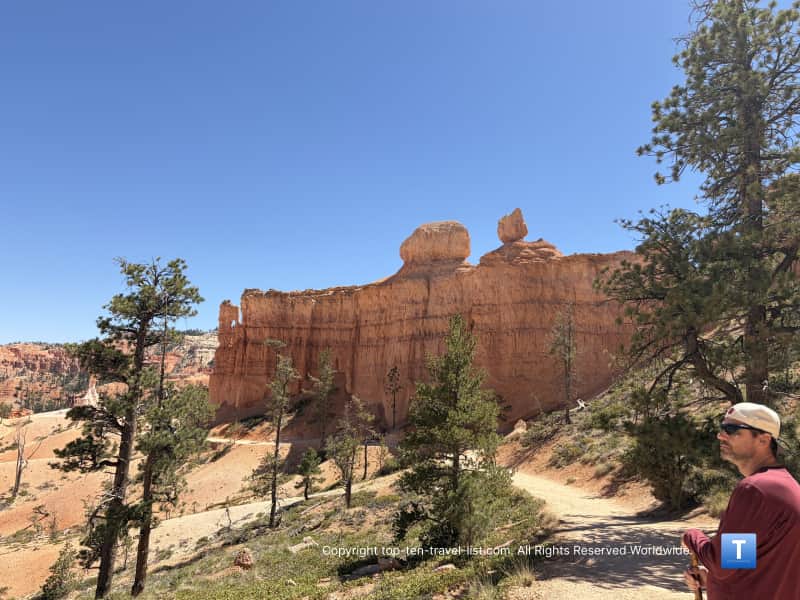
Queen Victoria
At the end of this trail, you will reach the Queen Victoria hoodoo. It’s one of the park’s most notable rock formations. There is a little history plaque here where you can read more but basically it is supposed to resemble a 19th century Queen of England. There is a fun NPS Hike the Hoodoos challenge for anyone with extra time and stamina.
Combining this hike with the Navajo loop
You can combine this trail with the Navajo Loop (2.9) miles for a more intense adventure. This loop is considered much harder than the out-and-back. The elevation gain is 625 feet and the switchbacks are much steeper. You can start this loop at either Sunrise or Sunset point.
The trek up the Navajo involves a steep series of switchbacks. You will get to see the famous Wall Street & 2 Bridges formations if you choose this loop so there is a benefit to the out-and-back.
Our shuttle driver recommend starting this trail in a clockwise direction as the descent down Queen’s Garden is less steep and they see lots of injuries when tourists begin their descent on the Navajo. Personally, I find trekking downhill so much more challenging as you have to take short steps and be hyper aware of your footing to prevent slipping.
Either trail you pick, the views do not disappoint. I would definitely add this hike to your bucket list if you consider yourself in reasonably good shape and up for a challenge.
Notes:
The elevation gain is 450 feet, although it felt like much more intense to me due to the lower oxygen levels.
Pets are not allowed.
There is parking at Sunrise Point or you can take the shuttle (recommend especially during the busy summer season). The shuttle runs from April-October.
You need a National Parks pass ($35 per car) to enter. I recommend an Annual Pass ($70) if you will be visiting more than a few parks in a single calendar year. It will pay for itself after 2-3 park visits.
The estimated time is 1-2 hours. It took us about an hour and 20 min with lots of stopping for pictures.
Restrooms and a water refill station are available at The General Store.
The General Store didn’t carry as many snacks as I thought they would. I couldn’t find a banana and they only sold gatorade in cans which is super inconvenient. I recommend bringing your own snacks like trail mix.
Follow all the trail signs and do not venture off the path. This trail is clearly marked so stick to it.
Tips for a great hike
Bring with plenty of water. A camelbak comes in handy for hotter and/or longer hikes. Also, at high altitude, a Gatorade (I like Gatorlyte) is recommended.
Try to set out earlier in the day during the summer season. The sun is really intense this high up!
Wear proper hiking shoes with good traction and proper workout apparel (I saw many tourists wearing jeans or dressy clothes). Also, prepare to sweat a lot.
Stay at Ruby’s Inn so you can take advantage of the complimentary shuttle and on-site restaurants.
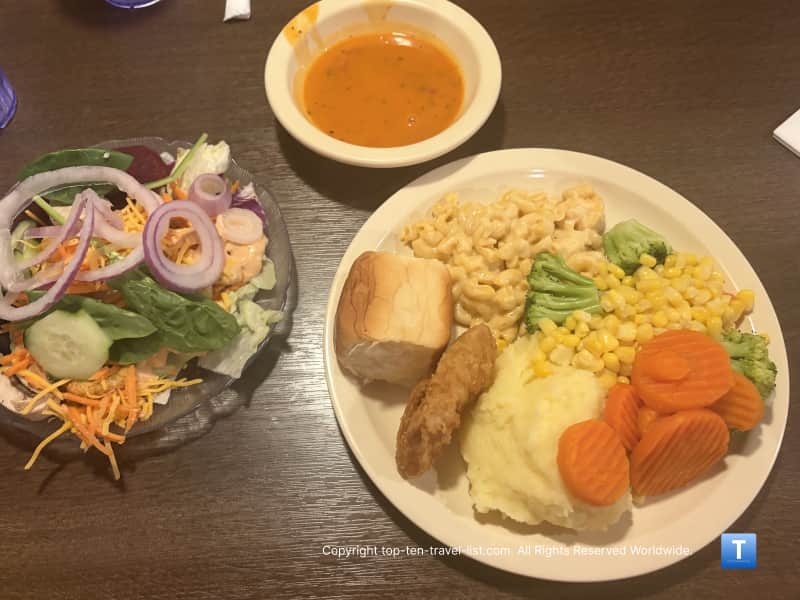
Eat a full breakfast or lunch before setting out. You will need extra energy to climb uphill and to combat the lower oxygen levels. We ate the Cowboy’s lunch buffet at Ruby’s Inn.